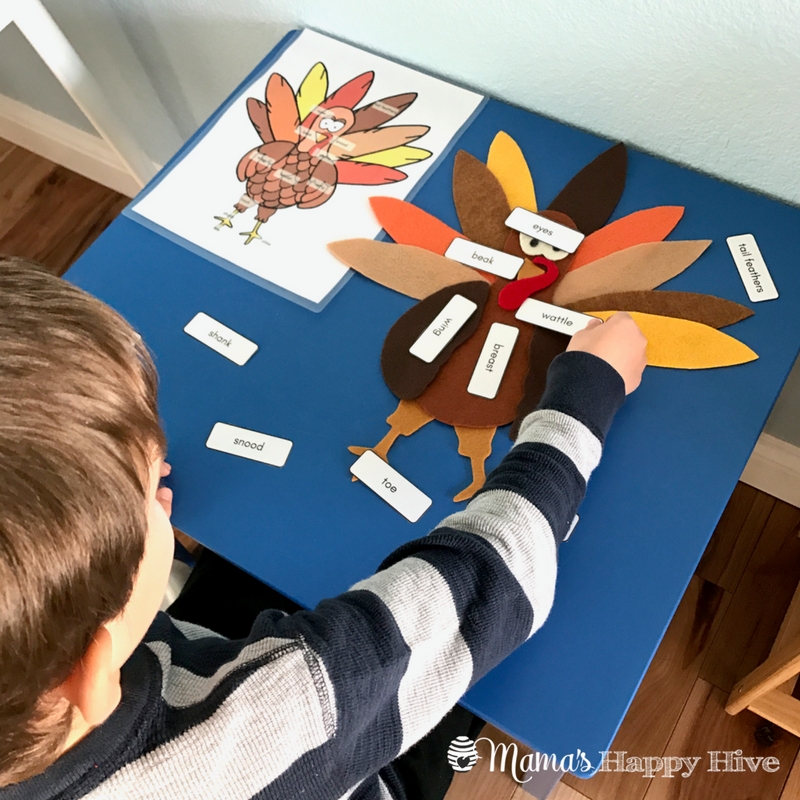
I created this DIY Felt Turkey with Free Printable Template as a hands-on way for Little Bee to learn more about the parts of a turkey. I enjoy using felt to create DIY Montessori puzzles. Felt is an economical alternative to actually purchasing the Montessori puzzles and sometimes there are not Montessori puzzles for every topic. Also, the DIY felt puzzles are lightweight and easy to store.
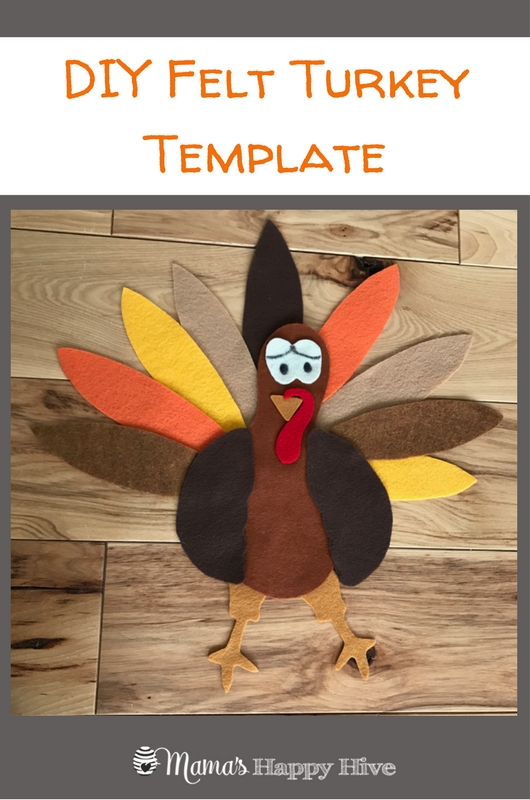
Materials Needed for DIY Felt Turkey:
- 1 Orange, 1 Yellow, 1 Light Brown, 1 Dark Brown, 1 Tan, 1 White, 1 Red - Thick (wool/rayon) Felt Sheets (9in x 12in sheets)
- Scissors
- Magic Marker to Draw the Eyes
- Pencil or Pen
- Crayons for Coloring the Control Card (optional)
- Free Turkey Template Printable for Tracing onto the Felt (scroll down)
Instructions for the Printable File
There are black and white turkey part outlines for you to cut out and then trace onto the felt. The downloadable file contains eight pages for printing. The first page is the terms of use. The second page is a colored diagram of the turkey and his labeled parts. The third page is the labels to use once you have assembled the felt turkey. The labels can be laminated and cut out. The fourth page is a black and white turkey to show how all the parts can be assembled. Pages five-eight are the individual parts of the turkey. Follow the steps below to assemble your very own felt turkey parts puzzle!
Steps to Create the DIY Felt Turkey Parts Puzzle
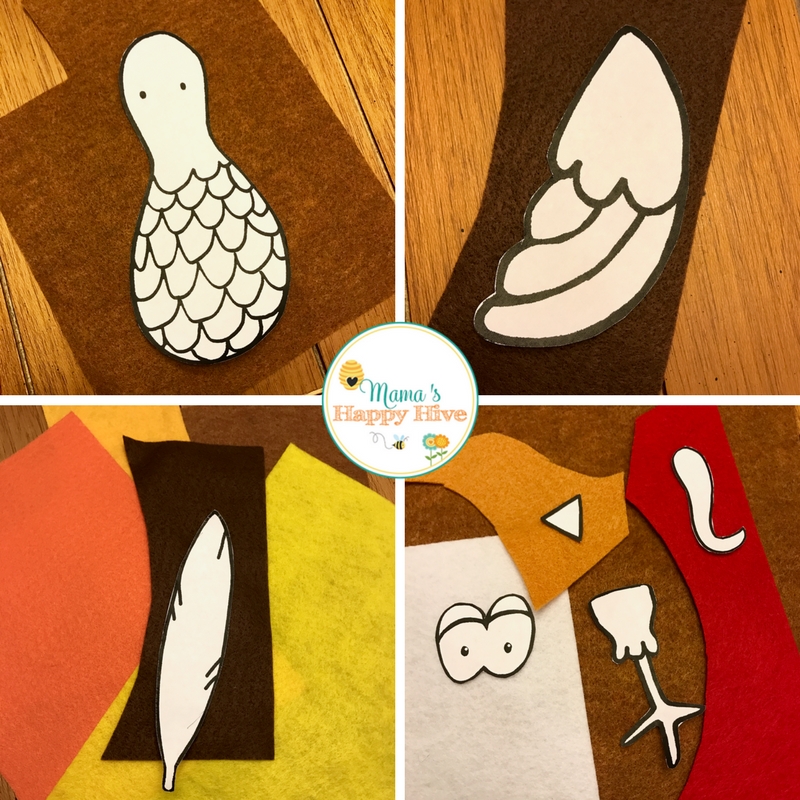
- Cut out all the parts of the black and white turkey parts on pages 5-8.
- Trace the body of the turkey onto a light brown felt sheet and then cut out again.
- Trace the wing twice onto a dark brown felt sheet and then cut out again.
- Trace 9 tail feathers onto various colors of felt - yellow, orange, light brown, dark brown, tan, other.
- Trace the eyes onto white felt, beak onto tan felt, snood/wattle onto red felt, and the legs onto lighter brown felt (lighter than the body). Then cut everything out again.
- Draw two black dots and eyelids onto the turkey's eyes with a black magic marker.
- Assemble the turkey as pictured in the printable or in this blog post. Have fun!
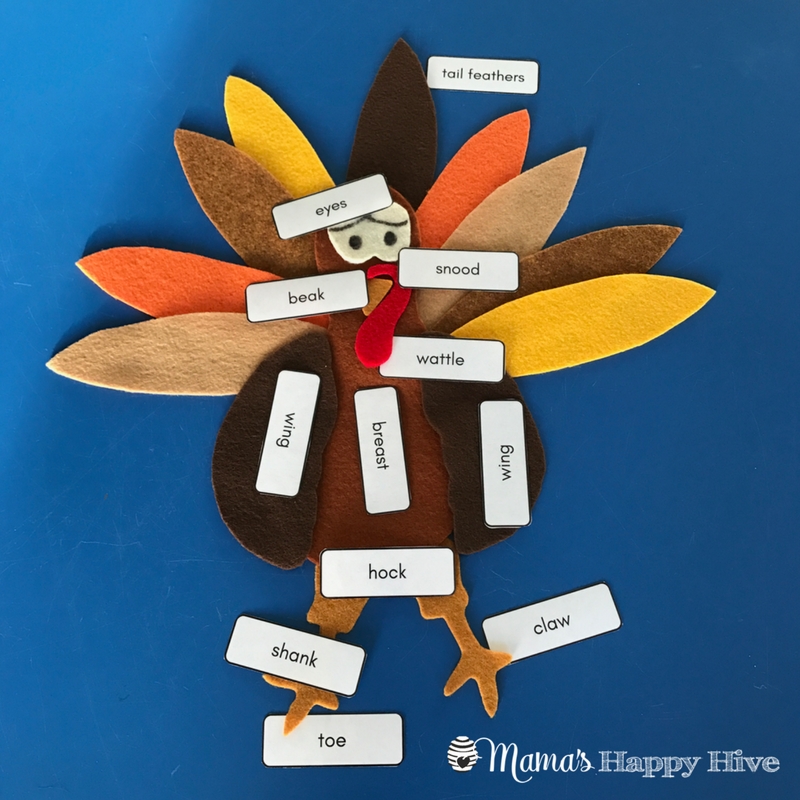
Parts of a Turkey
- Eyes
- Beak
- Snood
- Wattle
- Wing x 2
- Tail Feathers
- Breast
- Hock
- Shank
- Claw
- Toe
Download your Free Turkey Parts Printable and Diagram by clicking the link below:
Turkey Life-Cycle Extension Activities
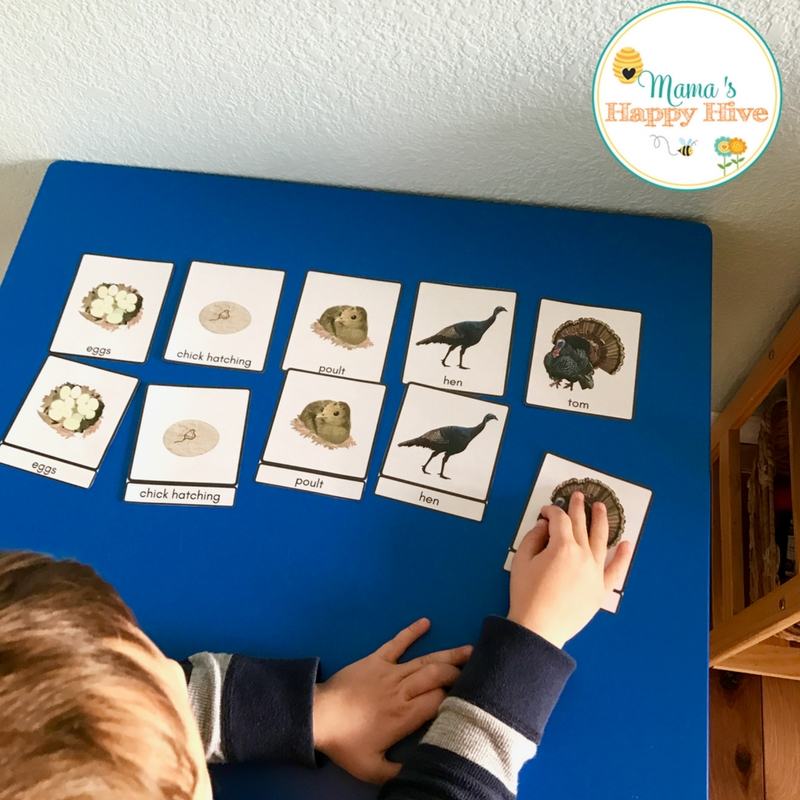
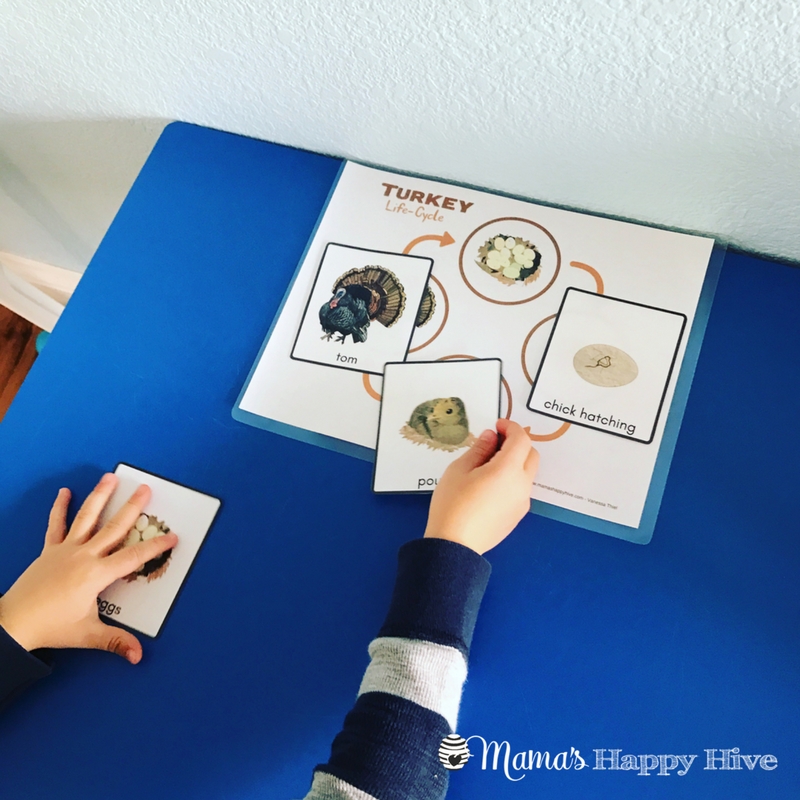
Below are wonderful turkey life-cycle 3-part cards that can be used as an extension exercise to the turkey anatomy (scroll to the bottom of the post to download). The 3-part cards are wonderful for a preschool aged child to use for vocabulary development and rational thinking. The matching of card to card is a great activity for a younger (2-3 years) child to practice visual discrimination.
Turkey Life-Cycle 3-Part Cards
The turkey life-cycle 3-part cards include the following:
- Eggs
- Chick Hatching
- Poult
- Hen
- Tom
Little Bee enjoyed learning about the life-cycle of the turkey by matching the images (card to card) and also using the turkey life-cycle spinner. All these printable activities are included in the 3-part card set on TpT.
To download the Turkey Life-Cycle 3-Part Cards, visit my Teachers Pay Teachers shop by clicking the link below:
Turkey Life-Cycle 3-Part Cards and Spinner
Do you want more?
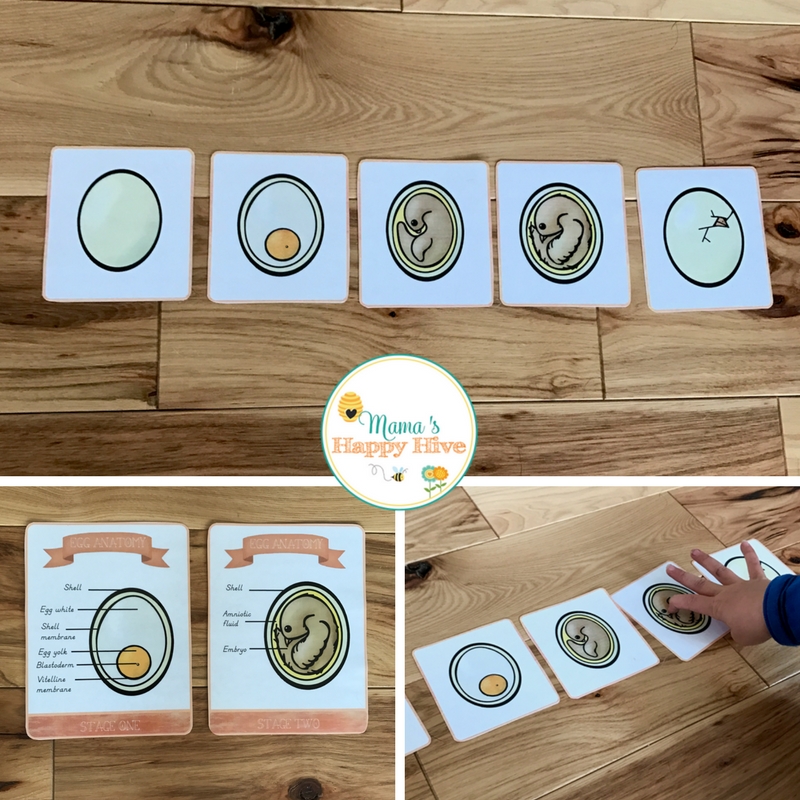
The following Turkey Parts of an Egg are from the "Welcome to Mommyhood" blog. These are beautiful images of the process of the formation of a chick inside an egg. Little Bee helped place the images in order of the hatching chick. You can find these turkey egg sequencing cards at the link below:
Turkey Egg Sequencing Cards and Anatomy of a Turkey Egg
Follow Mama's Happy Hive's board Life Cycles Unit Study on Pinterest.
Thanks for visiting and I hope you enjoy hours of fun with this DIY felt turkey and life-cycle cards! Enjoy!
You may also enjoy visiting our other farm themed posts ~
Montessori Inspired Horse Unit
Montessori Farm Life 3-Part Cards
DIY Felt Pumpkin Parts Life-Cycle


Leave a Reply